Introduction
This guide will take you through the options to add and manage computer objects through the web interface.
The computer object, by way of the Type field, in System Frontier is used for servers, workstations, mobile devices, switches, routers and firewalls. Currently, the bult-in tools for remote management target Windows servers and workstations, but any operating system or device can be managed with the use of custom tools.
Add a computer
Method for adding computers, one at a time.
Navigate to Manage > Computers then click Create.
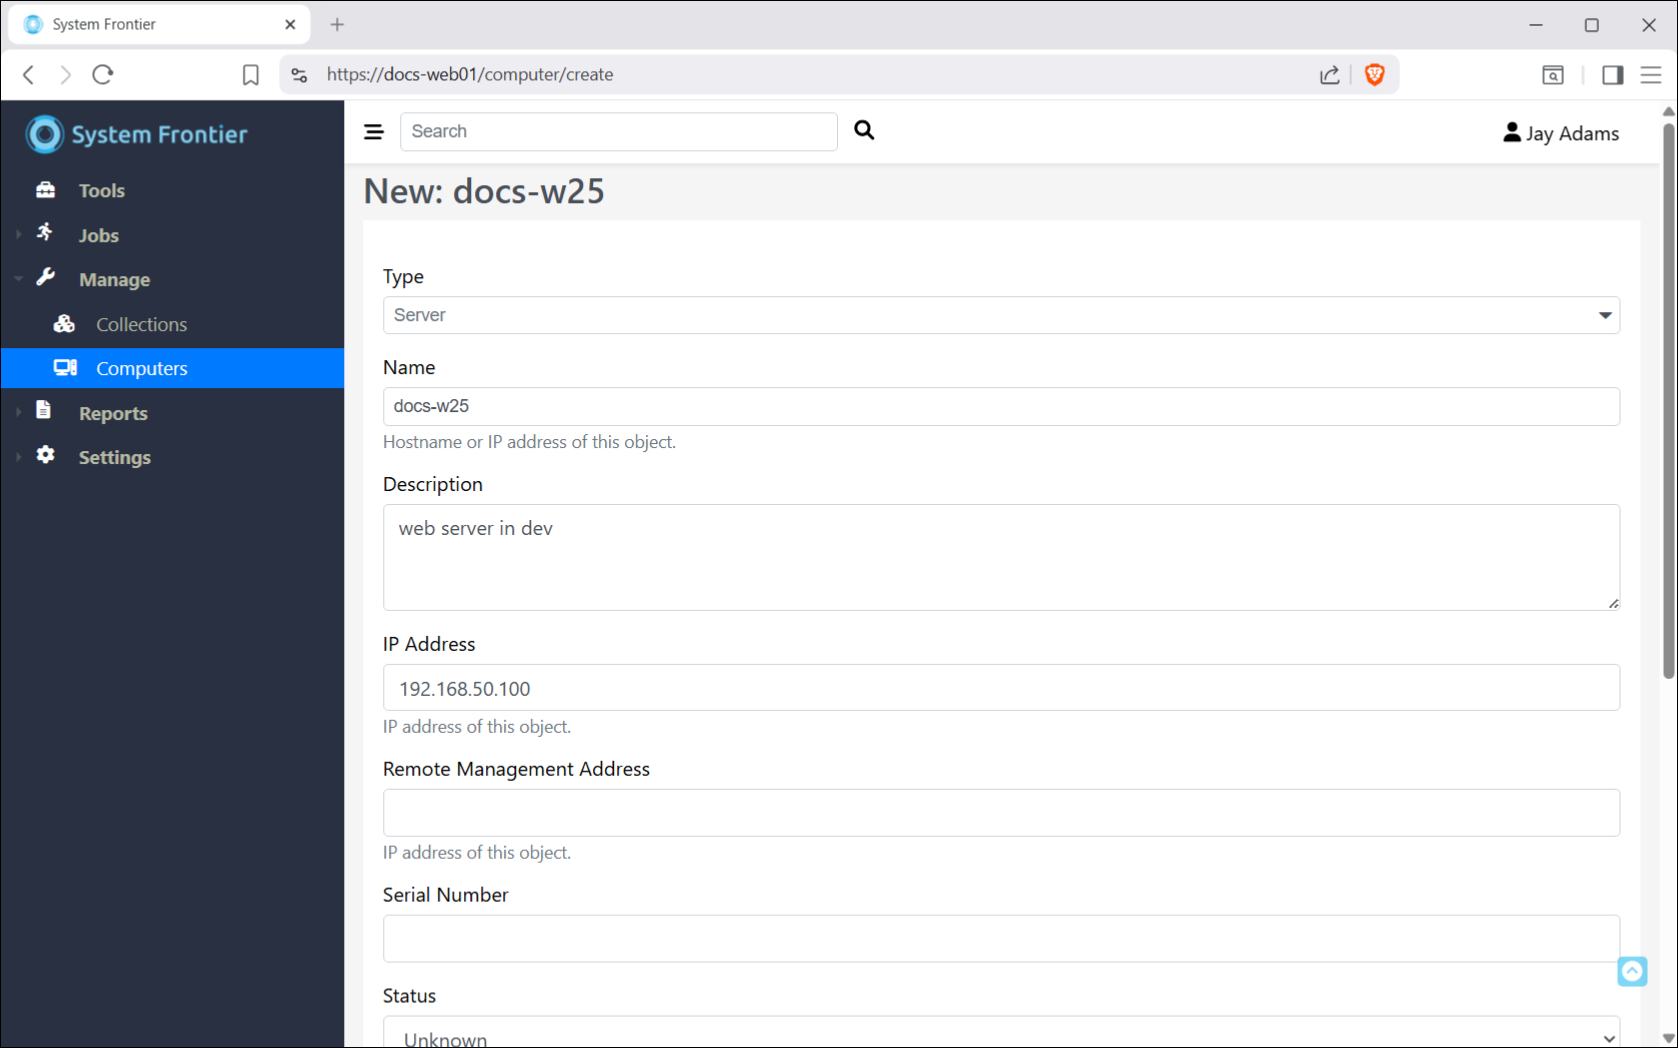
From the Type dropdown, select the type of computer object you’re adding.
In the Name field, provide the hostname or FQDN.
Status and Environment field values can be customized in settings.
Fill in other fields as needed and click Create.
Import a list of computers
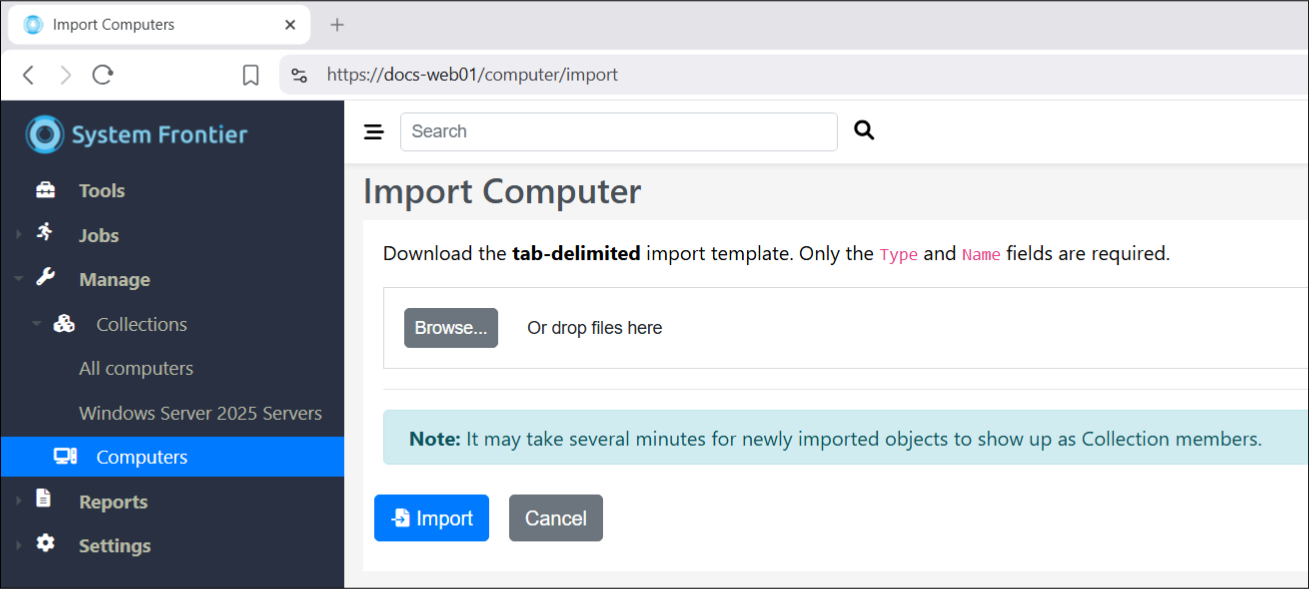
To begin, navigate to Manage > Computers then click Import.
For basic import needs, you can provide a list of hostnames, one per line.
Bulk import
Another option is to download the tab-delimited template file to fill in more information for each object.
Open the template file with Excel or your favorite CSV editor.
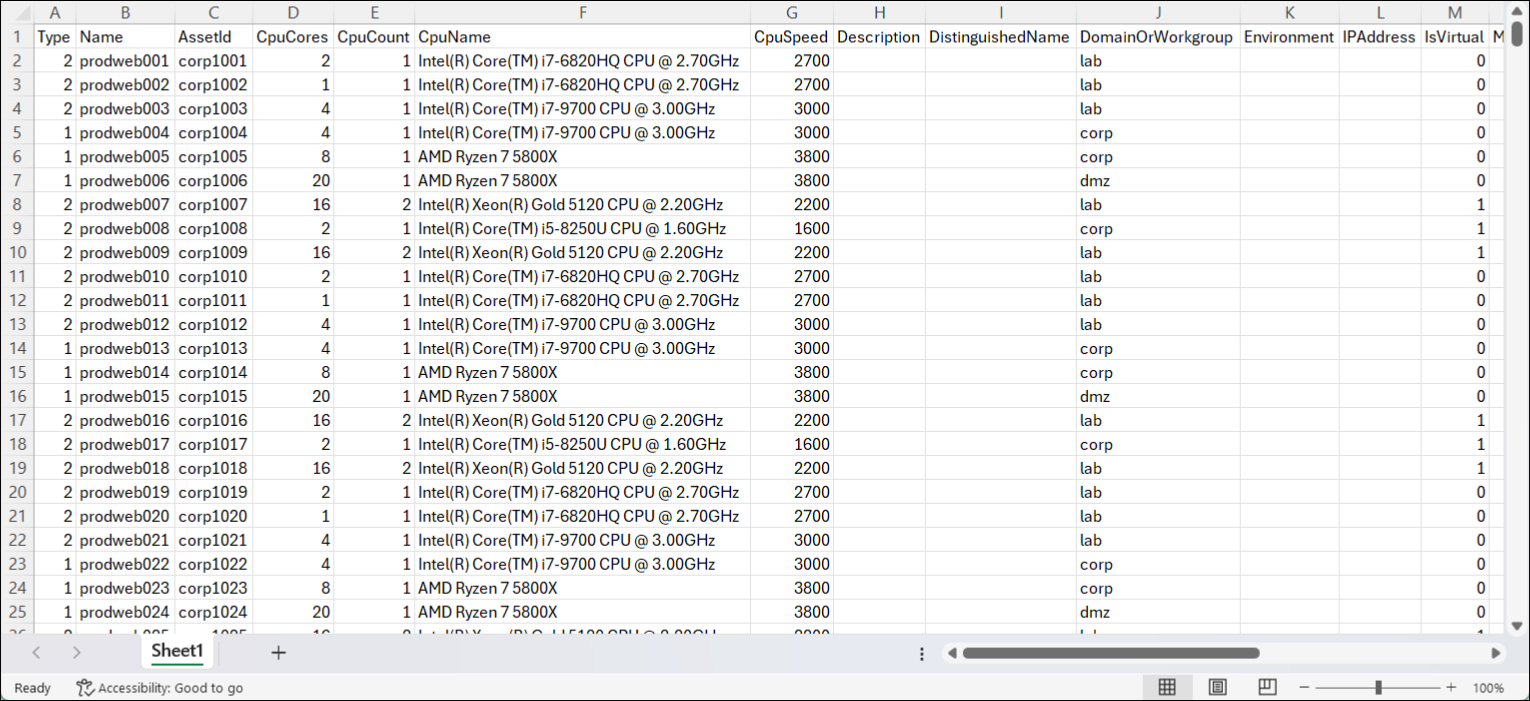
Once you’re ready, save the text file. Be sure that it is still in the tab-delimited format.
From the import page, browse to the file and select it or drag and drop it to the drop area. If there are no errors, click import.
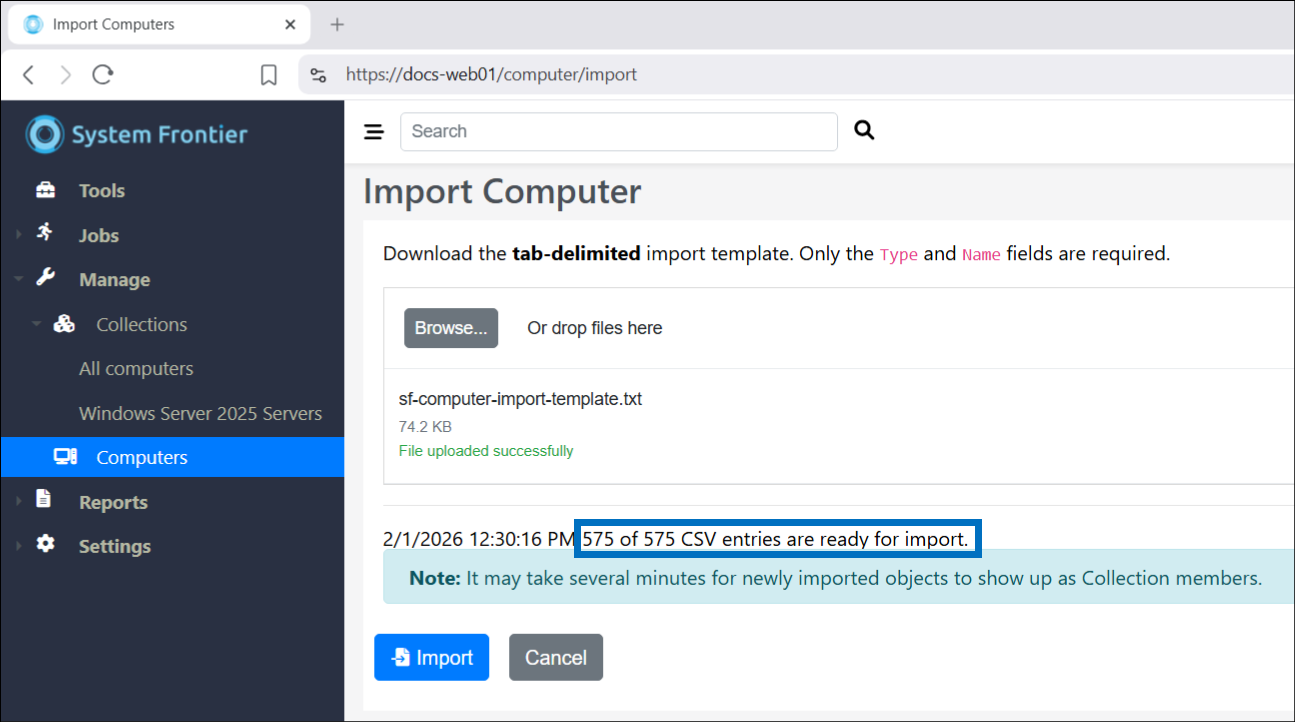
Once the import is complete, you should see a message similar to the one below.
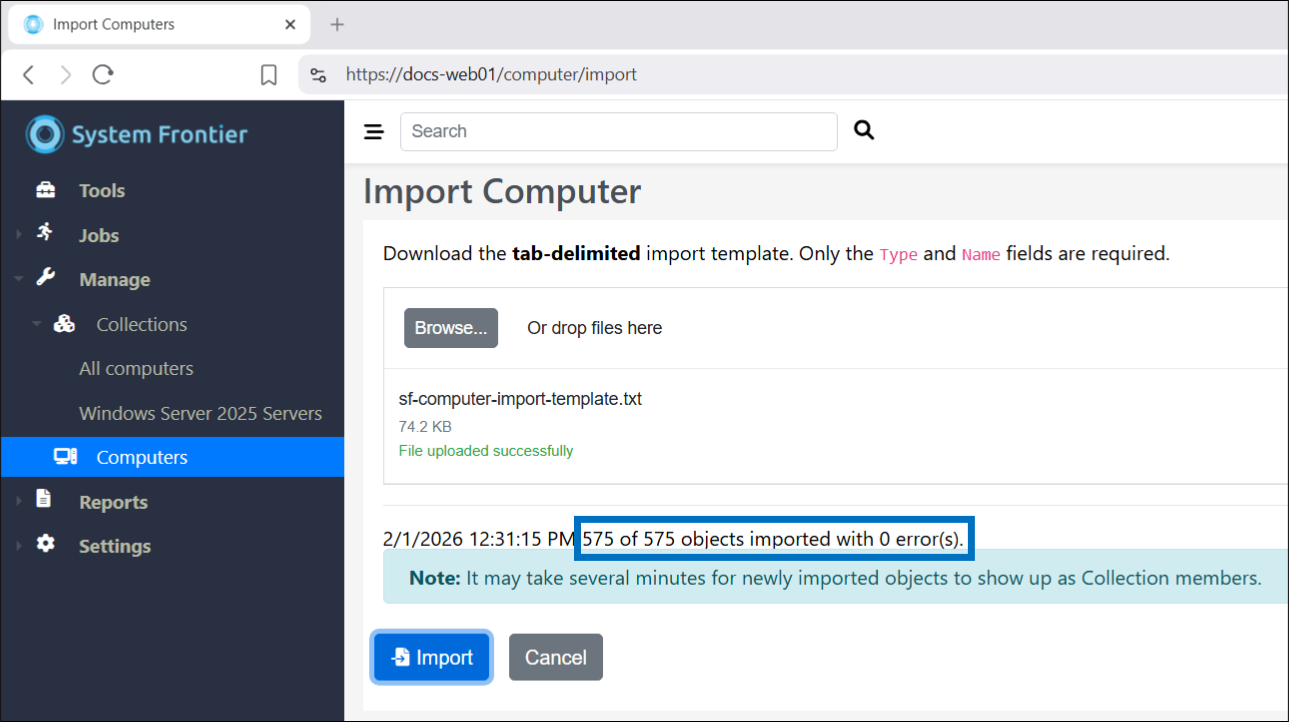
Verify import
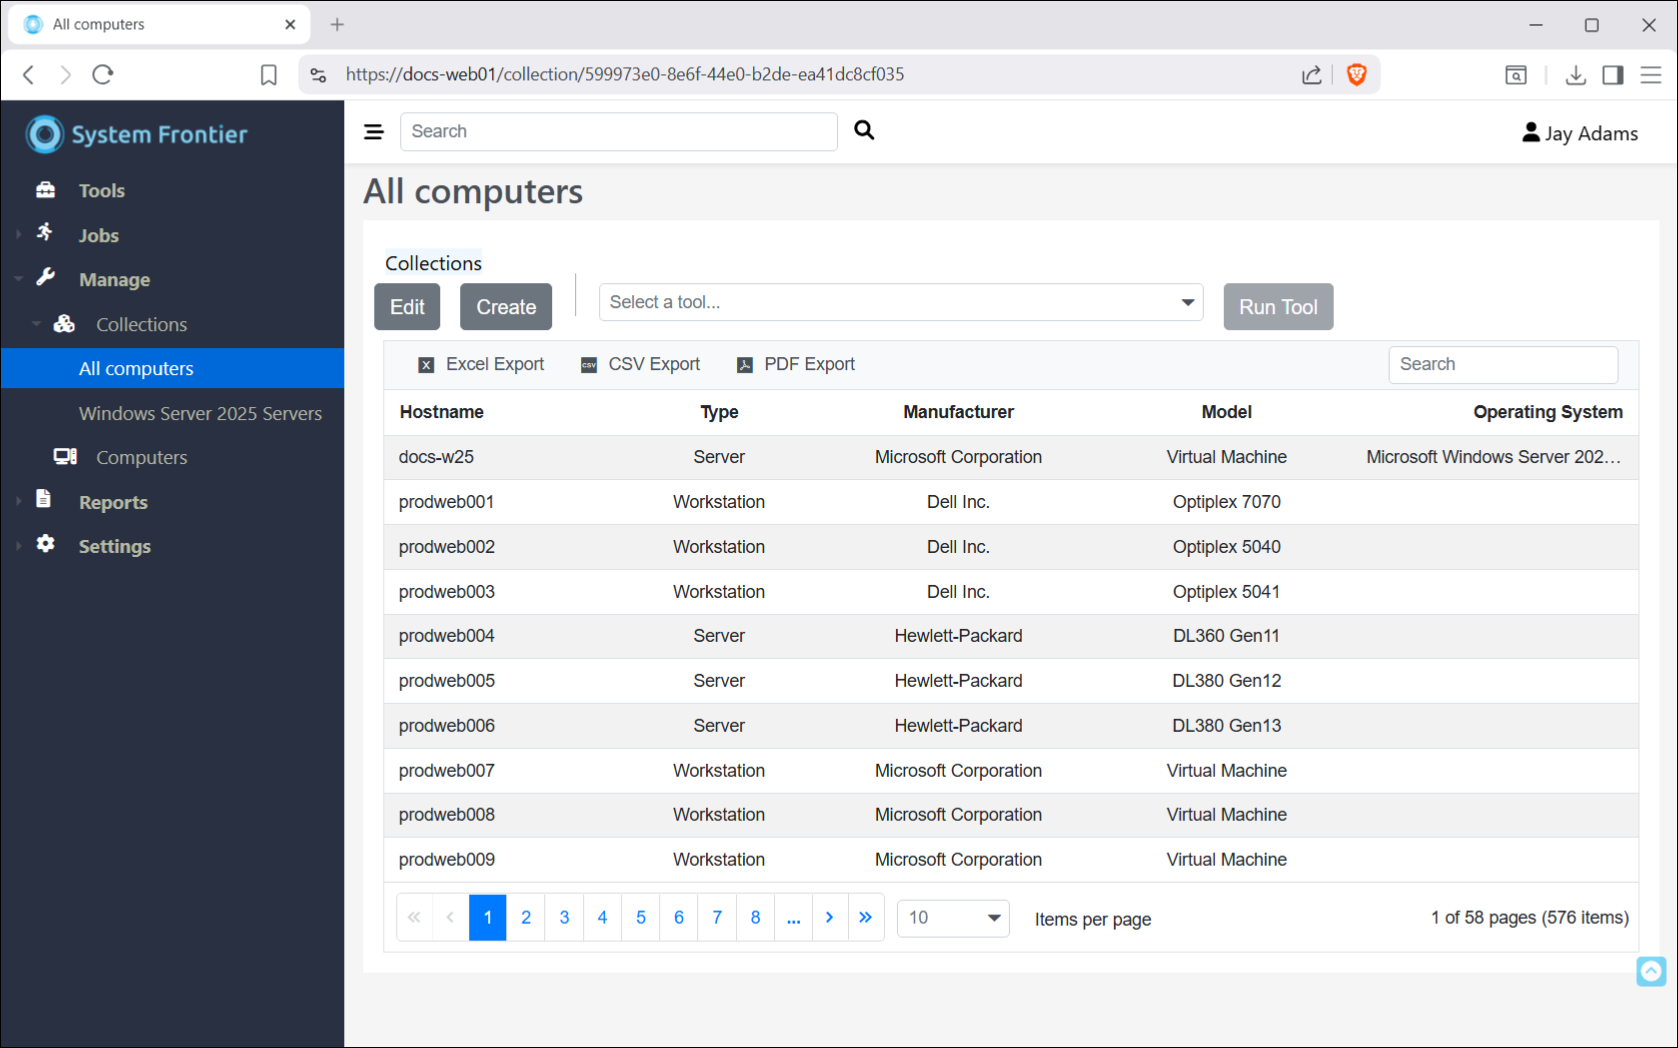
You can use the main search to find computers you just imported or navigate to a collection that should contain some or all of them.