
Manage > Containers
Introduction
This document will describe Containers and how to create, edit, and populate them. Custom Tools usage with a Container is also explained.
Managing Containers
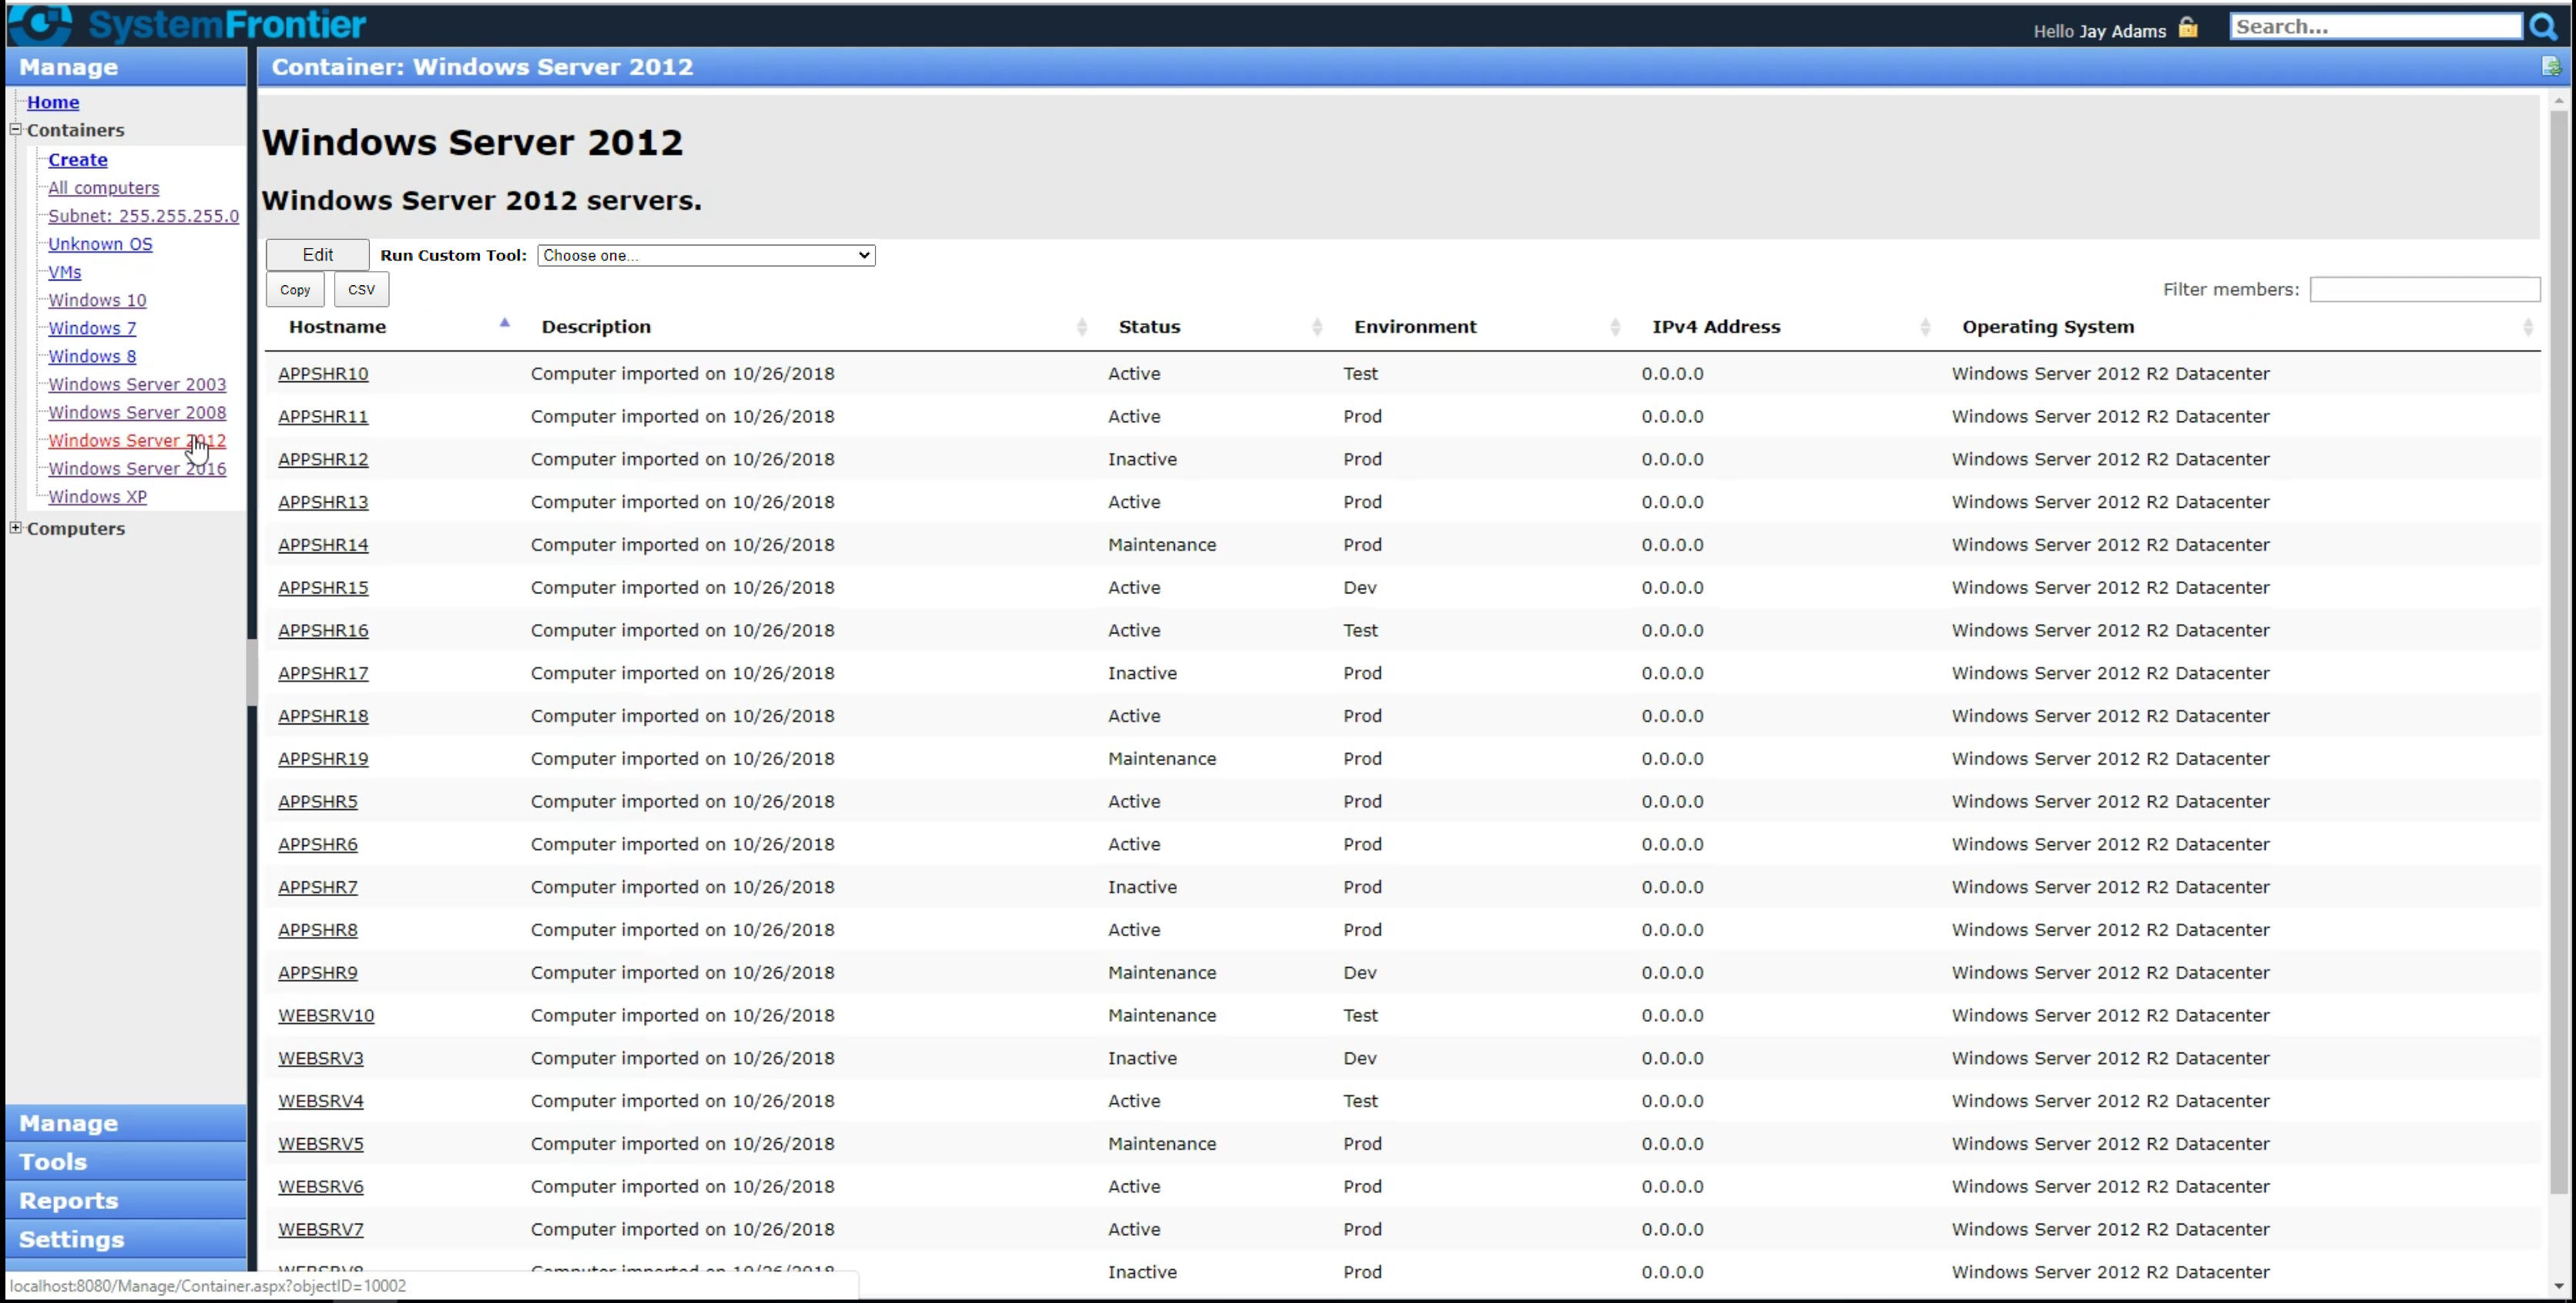
In the Container view, you are able to sort and filter the list, as well as change the number of members shown per page.
If you have been granted adequate permissions, you will see an Edit button, which gives you the ability to edit the membership of the Container. Likewise, if you have permission to run Custom Tools on the Container, a Run Custom Tool dropdown box will be visible.
Because everything in System Frontier is role-based, you will only see the Edit button and Run Custom Tool if you have been granted permission. Additionally, within the Run Custom Tool dropdown list you will only see those custom tools that you have permission to run. Underneath, the Copy button allows you to copy the Container members to the clipboard and the CSV button will let you save the member list and fields to a .csv file.
Selecting a Hostname from this page will take you to a management page for that specific member.
Adding a Container
To create a Container, navigate to Manage > Containers and click on the Create link in the menu. This will open up the Container (Insert) page:

On the Container (Insert) page enter a Name and Description then click the Save button. The new Container is generated and can be edited as normal.
Modifying a Container
When you click on the Edit button, you will see the Container (Edit) page:
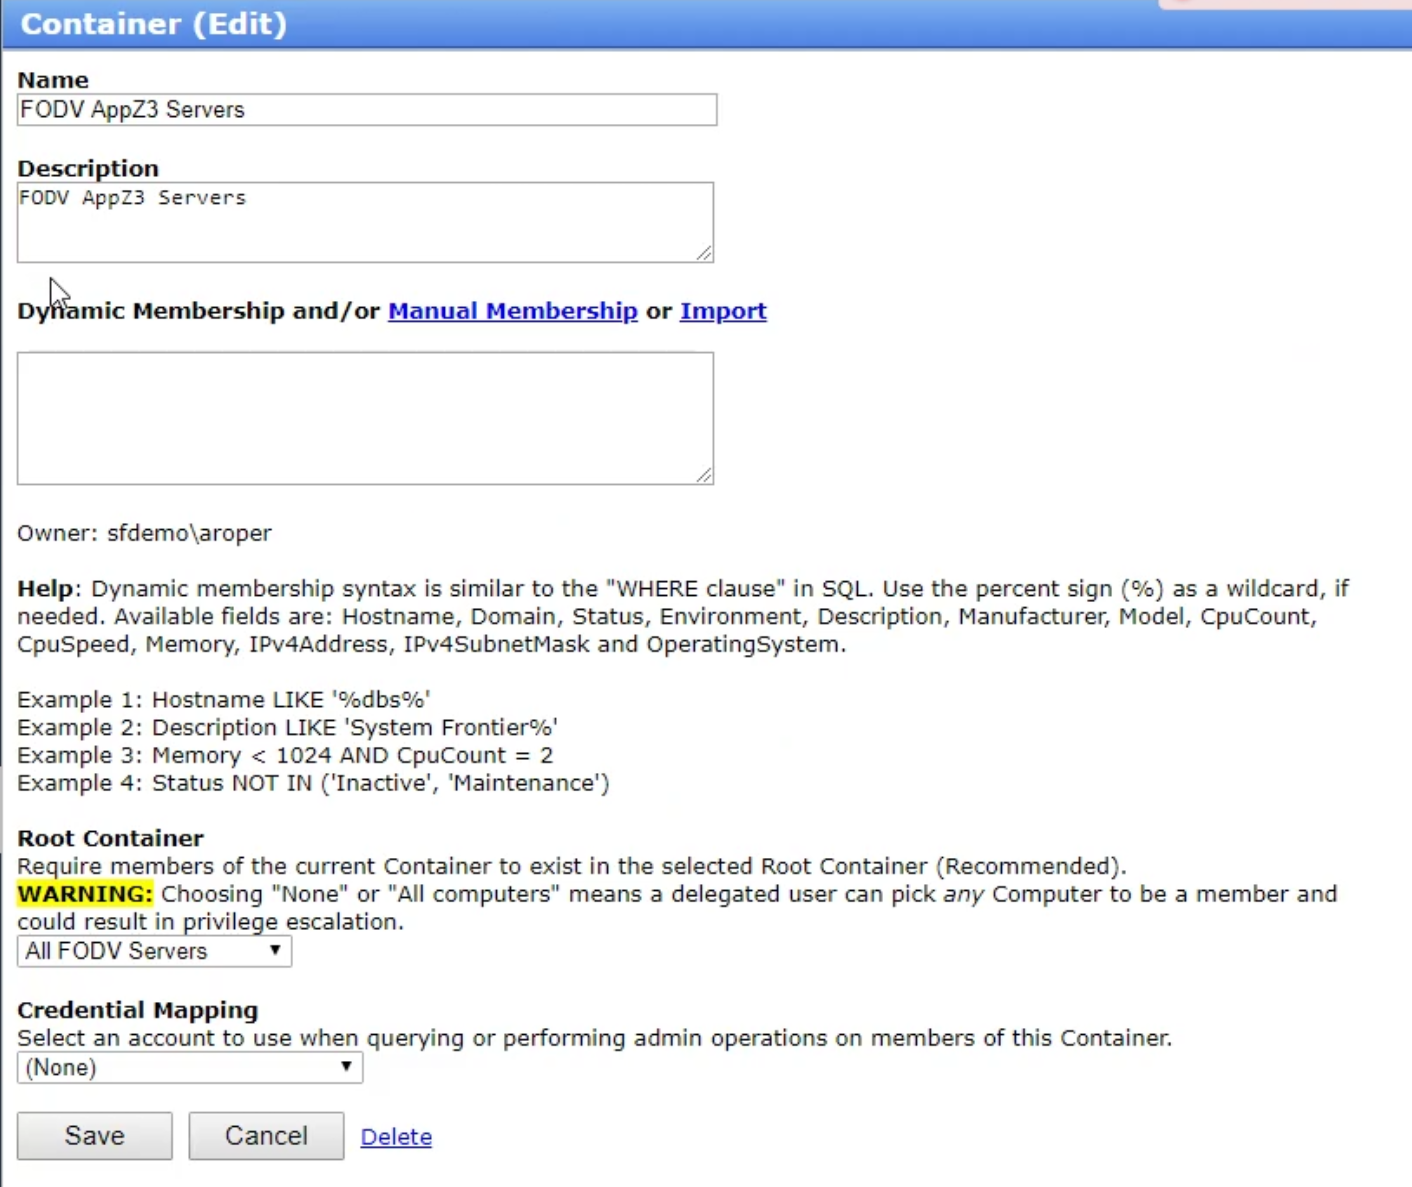
On the Edit page you will be able to modify the Container name, description, membership, and credential mapping.
Name
Use a meaningful name for the Container. You can name it based on the type of members within it, by an application for which the members are used, by site/location, or whatever may fit your needs.
Description
Be sure to accurately describe the Container to avoid confusion.
Membership
The Container membership can be derived from a dynamic SQL query (like a “where clause”), manual entry, or through an import.
Dynamic Membership uses the default SQL query. The benefit of using this method is that you don’t have to keep track of the membership. As nodes come and go, if they meet the query’s criteria and exist in the System Frontier database, they will automatically be populated into the Container or removed if they do not. Basically, you will enter into the field a WHERE clause similar to this:

Here is the full list of fields which can be queried with the WHERE clause:
- BusinessUnit
- Company
- CpuCores
- CpuCount
- CpuSpeed
- Description
- DistinguishedName
- Domain
- Environment
- Hostname
- IPv4Address
- Ipv4SubnetMask
- ManagementIPv4Address
- Manufacturer
- Memory
- Model
- ObjectGUID
- ObjectID
- OperatingSystem
- SerialNumber
- Status
- Tag
Take a look at the Help section under Dynamic Membership for other usage examples.
Manual Membership uses a manual input form. Enter the criteria and click the Search button. If there are results, they will be shown. Simply select the items desired and click Add to add them as members of the Container.


You can also delete any members. Just select the member and click Delete.

Import will allow you to enter a list of nodes to add to the Container. Enter a list of nodes and click Import to add them.

Root Container
Set the Root Container to limit the scope of computers that a Container will have as members. This is valuable when using the Role delegation feature of System Frontier.

Credential Mapping
The Credential Mapping field in a Container will automatically use the credentials indicated in the All Computers Container by default unless it is specified differently here. To change the credentials used, click the dropdown list and select whichever Credential is needed for this Container.

Deleting a Container
To delete a Container, click on the Delete link on the Container (Edit) page.
How to Run a Custom Tool on a Container
Open a Container and select the Custom Tool that you wish to run against the members of that Container. If you don’t know the exact name of the tool, you can begin typing letters and the list options will narrow based on your criteria. The tool selected will be run for all of that Container’s members and results shown.


After clicking the Run button the results will be displayed on the Job Details page.
Be sure to read the User Guide for more information.
